How to Brine Chicken Breast for Tender & Flavorful Results
Brining is a simple trick to turn a basic chicken breast into a gourmet dish. It’s a skill that can make your cooking stand out. With the right steps, anyone can achieve amazing results at home.
Brining makes chicken juicy and full of flavor. It’s perfect for both home cooks and chefs. This guide will show you how to brine chicken breast like a pro.
Table of Contents
Understanding the Science Behind Chicken Brining

Brining chicken is not just a cooking trick. It’s a science that turns regular chicken into a tender, tasty dish. When you make a chicken brine, you mix salt, water, and protein in a way that makes meat better.
Brining works in two main ways to make your food better:
- Molecular protein restructuring
- Water absorption and retention
- Flavor enhancement at a cellular level
Osmosis and Protein Modification
The magic starts with osmosis. When chicken is in a saltwater solution, salt gets into the meat. This makes proteins relax and hold more moisture.
“Salt is the key that unlocks flavor and tenderness in chicken.” – Professional Chef Insight
Salt Concentration Effects
The amount of salt in your brine is very important. Too little salt doesn’t work, and too much can make meat tough. The best mix is usually 5-8% salt to water.
Moisture Retention Mechanics
Brining changes the meat’s proteins to hold water better. This keeps your chicken juicy while it cooks. You get a moist, tasty chicken that’s a hit at any meal.
Essential Ingredients for the Perfect Chicken Brine
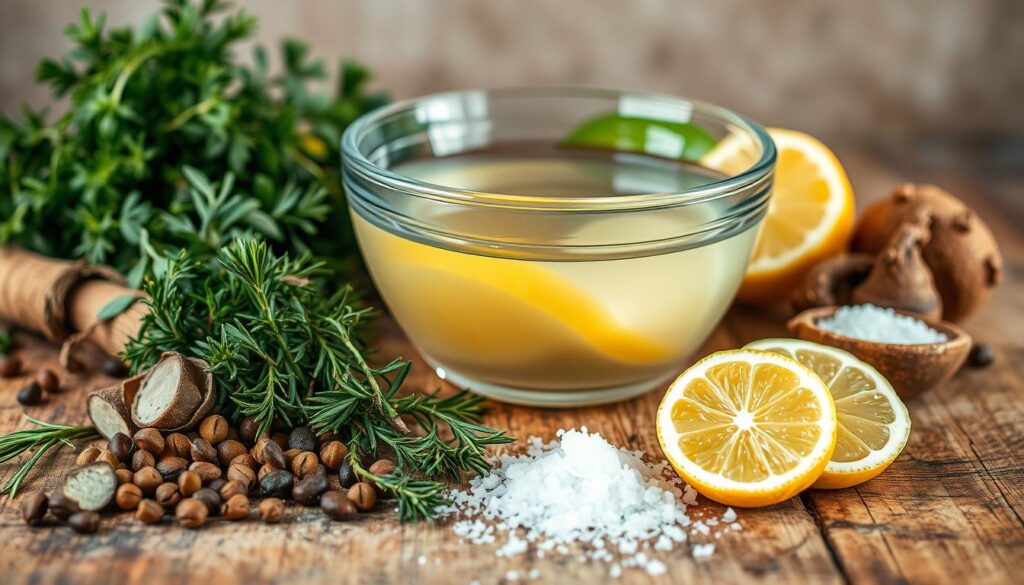
To make the perfect chicken brine, you need to know the key ingredients. These ingredients turn a regular chicken breast into a juicy, flavorful dish. Salt is the main ingredient, as it helps the meat stay tender.
When you’re learning to brine chicken breast, focus on these important ingredients:
- Kosher Salt: This is the main ingredient that keeps the meat moist
- Water: It’s the liquid base of your chicken brine
- Optional flavor enhancers:
- Brown sugar
- Herbs like rosemary and thyme
- Whole peppercorns
- Garlic cloves
The salt amount is key in your chicken brine. A good ratio is 1 cup of salt per gallon of water. This mix is perfect for making the meat tender and keeping it moist.
Adding extra ingredients can make your chicken brine even better. Try using citrus zest, bay leaves, or apple cider. These add deep, complex flavors to the meat.
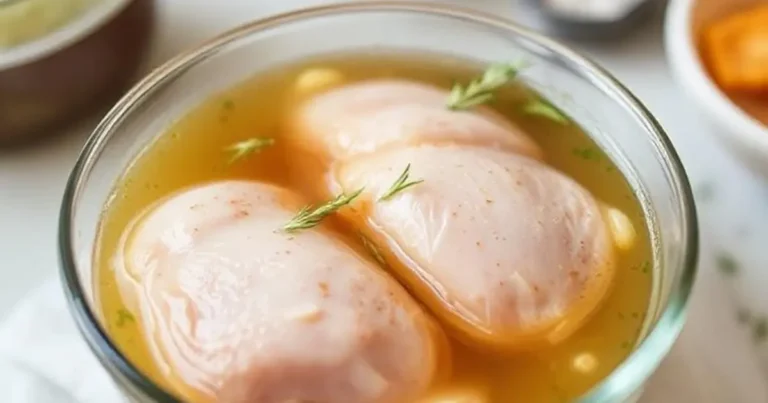
How to Brine Chicken Breast: Step-by-Step Guide
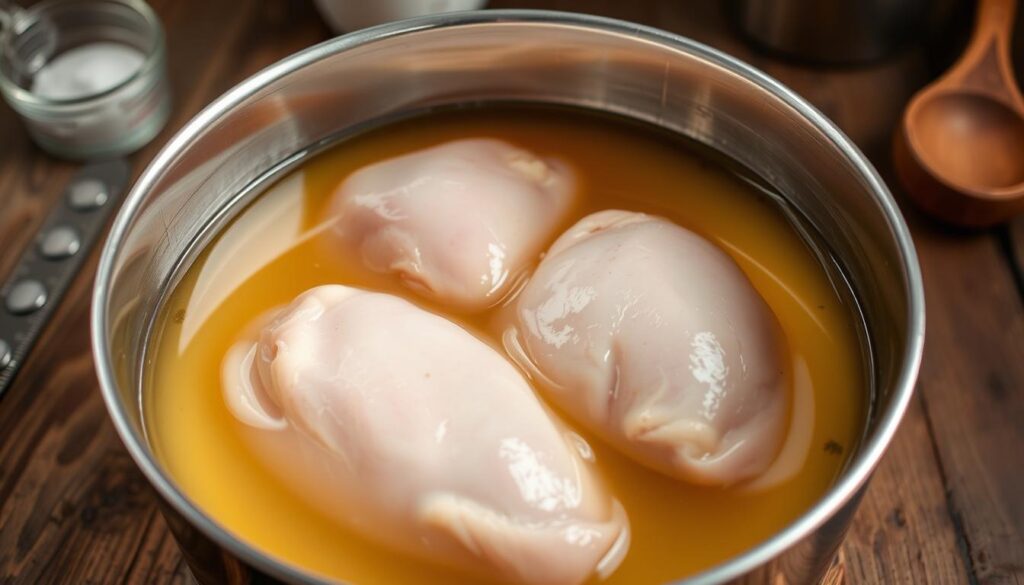
Learning how to brine chicken breast can change your cooking game. It makes your meat juicy, flavorful, and tender. This guide will show you how to make a great brine chicken recipe.
Brining is a simple yet powerful technique. It can make your chicken dishes much better. By following these steps, your chicken breast will stay moist and full of flavor.
Preparing Your Brine Solution
To make the perfect brine solution, pay close attention to detail. Here’s what you’ll need:
- Kosher salt (4-6 tablespoons)
- Cold water (4 cups)
- Optional flavor enhancers:
- Fresh herbs
- Garlic cloves
- Peppercorns
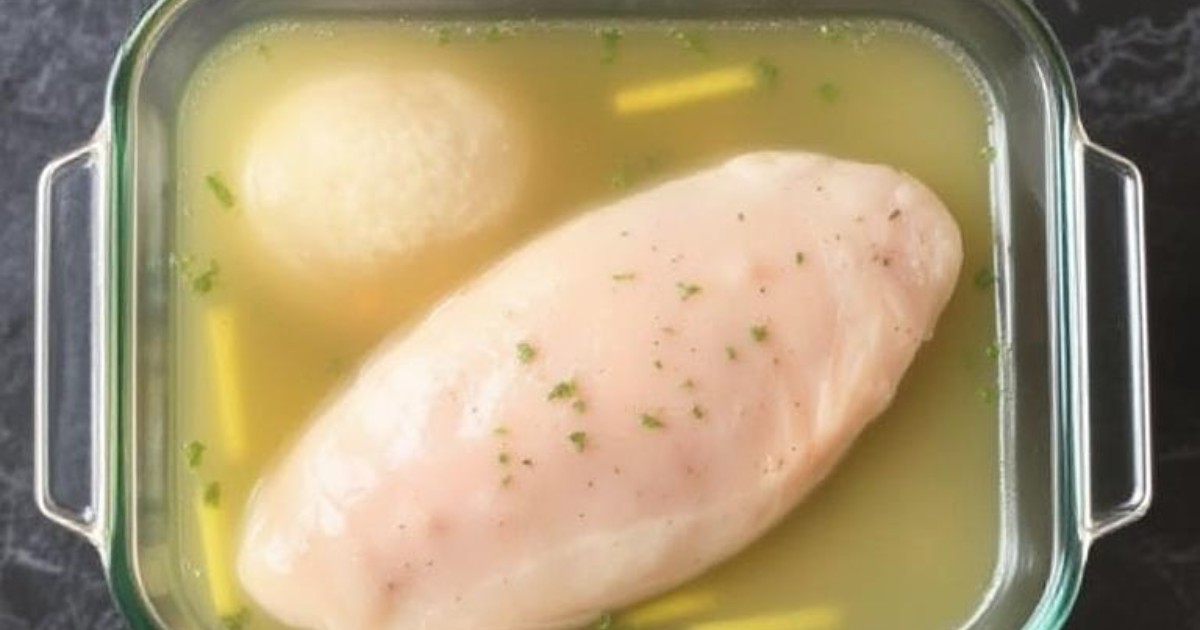
Proper Chicken Preparation
Before brining, make sure your chicken breast is clean and trimmed. Dry the meat with paper towels to help the brine soak in better. Pro tip: Choose fresh, high-quality chicken for the best results.
Brining Time Guidelines
Timing is key when brining chicken breast. Here are some guidelines:
- Thin chicken breasts: 30 minutes to 1 hour
- Standard chicken breasts: 1-2 hours
- Thick chicken breasts: Up to 3 hours
“The key to perfect brining is balance – too little time means minimal flavor, while too long can make your chicken too salty.” – Professional Chef
Always rinse your brined chicken and pat it dry before cooking. This removes excess salt. Your perfectly brined chicken breast is now ready to be transformed into a culinary masterpiece!
Common Brining Mistakes to Avoid
Learning to brine chicken breast can be tricky. Many mistakes can ruin what could be a tasty meal. It’s important to know these common errors to avoid them.
- Over-Brining: Chicken can become too salty and tough if brined too long
- Getting the salt concentration wrong can upset the brine’s balance
- Brining with warm water can lead to bacterial growth
- Not drying the chicken before cooking can stop it from browning well
Brining chicken needs precision. Different cuts of chicken need different brining times. For example, a chicken breast usually needs 30 minutes to 2 hours, depending on its size and thickness.
| Chicken Type | Recommended Brining Time | Salt Concentration |
|---|---|---|
| Chicken Breast | 30-120 minutes | 5-6% salt solution |
| Whole Chicken | 8-12 hours | 4-5% salt solution |
| Chicken Thighs | 1-4 hours | 5-6% salt solution |
To avoid fridge issues, keep your brine mixture cold. Use a food thermometer to check the temperature. This helps prevent foodborne illnesses during brining.
Pro tip: Always rinse your brined chicken and pat it completely dry before cooking to achieve optimal texture and flavor.
Dry Brine vs. Wet Brine Methods
Choosing the right chicken brine method can make a big difference in your cooking. Both dry and wet brining have their own benefits for making tasty chicken, especially for smoked chicken brine.
Dry and wet brining differ in how they work and what they do. Knowing these methods helps you pick the best one for your cooking.
Benefits of Brining Techniques
- Dry Brine Benefits:
- Crispy skin development
- Enhanced natural chicken flavor
- Less messy preparation
- Wet Brine Benefits:
- Deeper moisture penetration
- More uniform seasoning
- Better for lean meat cuts
When to Use Each Method
Choosing between dry and wet brine depends on several things. Dry brining is great for roasted or grilled chicken. Wet brining is best for smoked chicken brine.
| Brining Method | Ideal Use | Preparation Time |
|---|---|---|
| Dry Brine | Roasting, Grilling | 1-24 hours |
| Wet Brine | Smoking, Slow Cooking | 4-12 hours |
Time and Storage Requirements
For the best results, keep your chicken in the fridge during brining. Dry brining takes less time, but wet brining needs longer. Always keep chicken at 34-40°F to avoid bacterial growth.
Pro tip: No matter your brine choice, patience and keeping the right temperature are crucial for tender and flavorful chicken.
Flavor Variations and Seasoning Tips
Turning your chicken brine into something special takes creativity and knowing about flavors. A good chicken brine can make simple chicken into a dish to remember. Whether you’re roasting or frying chicken, the right seasonings are crucial.
Here are some exciting flavor mixes to try:
- Citrus-Herb Blend: Use lemon zest, fresh rosemary, and thyme for a bright taste
- Southern-Style: Add paprika, garlic powder, and cayenne for spicy fried chicken
- Asian-Inspired: Mix ginger, star anise, and green onions for a unique flavor
- Spicy Southwestern: Try cumin, chili powder, and jalapeño for bold tastes
Fried chicken brine is especially powerful. It’s all about finding the right balance of salt and spices. A Southern-style brine often includes buttermilk, which tenderizes the meat and adds a tangy touch.
Remember, always taste your brine before adding chicken. The salt should be strong but not too much. Try different herbs, spices, and liquids to find your favorite chicken brine recipe.
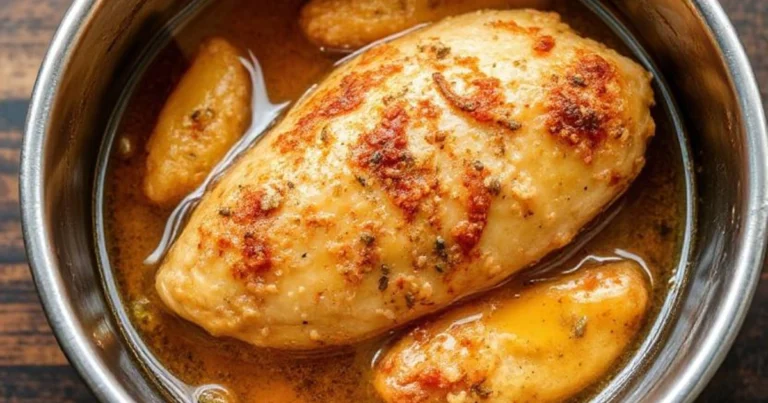
Cooking Your Brined Chicken Breast
Learning how to brine chicken breast is just the start. Now, you need to cook it right to show off your cooking skills. The right method can turn your brined chicken into a dish that’s juicy and full of flavor.
Precise Temperature Control
Cooking brined chicken needs careful attention to temperature. You aim for an internal temperature of 165°F (74°C) for safety and moisture. A digital meat thermometer is your top tool for cooking smoked chicken brine recipes.
Versatile Cooking Methods
You can cook your brined chicken breast in several ways:
- Grilling: High heat makes nice grill marks
- Roasting: Even cooking in the oven
- Pan-searing: Quick for a crispy outside
- Smoking: Rich, deep flavor for brined chicken
Checking Doneness
Knowing when your chicken is done is more than just temperature. Look for these signs:
- Clear juices when pierced
- Firm but not hard texture
- Internal temperature of 165°F
- No pink meat near the bone
Letting your brined chicken rest for 5-10 minutes after cooking helps. It makes the meat tender and juicy.
Storage and Food Safety Guidelines
Storing chicken brine properly is key to food safety and keeping your chicken breast fresh. Raw brined chicken needs careful handling to avoid bacterial growth and foodborne illnesses.
Refrigeration is essential when making chicken brine. Always keep your brined chicken breast at temperatures below 40°F (4°C). This stops harmful bacteria from growing and keeps your meat safe to eat.
- Refrigerate brined chicken immediately after preparing the brine solution
- Store in a covered container to prevent cross-contamination
- Use within 2-3 days of brining for optimal freshness
Storage methods vary for raw versus cooked brined chicken. Raw brined chicken should be used within 24 hours. Cooked chicken can be safely stored in the fridge for 3-4 days.
| Chicken Type | Refrigeration Time | Storage Recommendation |
|---|---|---|
| Raw Brined Chicken | 24 hours | Keep sealed, below 40°F |
| Cooked Brined Chicken | 3-4 days | Store in airtight container |
Always use clean utensils and wash your hands well when handling chicken brine. Don’t reuse brine solutions, as they can be dangerous. If you’re unsure about the safety of your brined chicken, it’s best to throw it away.
By following these guidelines, you can enjoy delicious, safely prepared chicken breast every time you use a chicken brine method.
Conclusion
Learning to brine chicken breast makes it taste amazing. It turns simple chicken into a dish that wows everyone. You’ll get better at making juicy, flavorful chicken that everyone loves.
Brining chicken is all about mixing salt, water, and spices right. It’s about mastering the art of keeping chicken moist and tasty. You need to practice, try new flavors, and follow food safety rules.
Brining takes time, attention to detail, and a love for trying new things. You can use wet or dry brining, each with its own perks. With time, you’ll make chicken as good as in a restaurant.
Adding brining to your cooking opens up new possibilities. Begin with small steps, learn from each try, and be bold with new flavors and times. Find your favorite way to brine chicken.
FAQ
How long should I brine chicken breast?
The brining time varies with chicken breast size. For boneless, skinless breasts, aim for 30 minutes to 2 hours. Longer than 2 hours can make the meat too salty. Thicker or bone-in breasts might need 4-6 hours.
Can I use table salt for brining?
Table salt works, but kosher or sea salt is better. They dissolve better and flavor more evenly. Use half the amount of table salt to avoid over-salting. Morton’s Kosher Salt or Diamond Crystal are good choices.
Is brining safe for chicken?
Yes, brining is safe if done right. Use clean tools and keep chicken cold. Follow food safety: clean containers, refrigerate, and cook to 165°F (74°C).
What’s the difference between wet and dry brining?
Wet brining soaks chicken in saltwater for moisture. Dry brining uses salt and seasonings on the chicken for crispiness. Wet brining makes meat juicy, while dry brining makes skin crispy.
Can I add other ingredients to my chicken brine?
Yes! Add brown sugar, herbs, garlic, peppercorns, and citrus zest for extra flavor. Just don’t overdo it to keep the meat’s natural taste.
How much salt should I use in a chicken brine?
Use 1 cup of salt per gallon of water for a standard brine. For a 5-6% solution, use 2-3 tablespoons of kosher salt per quart. Adjust based on your recipe and taste.
Can I brine frozen chicken?
Thaw chicken before brining for even salt absorption and safety. Always thaw in the fridge, never at room temperature. Brine only after thawing.
Does brining work for all chicken cuts?
Brining is good for most chicken cuts, like breasts, thighs, and whole chickens. Each cut might need different brining times. Leaner cuts like breasts benefit the most.